Application Load Balancer Access Log Management
What is Access Log?
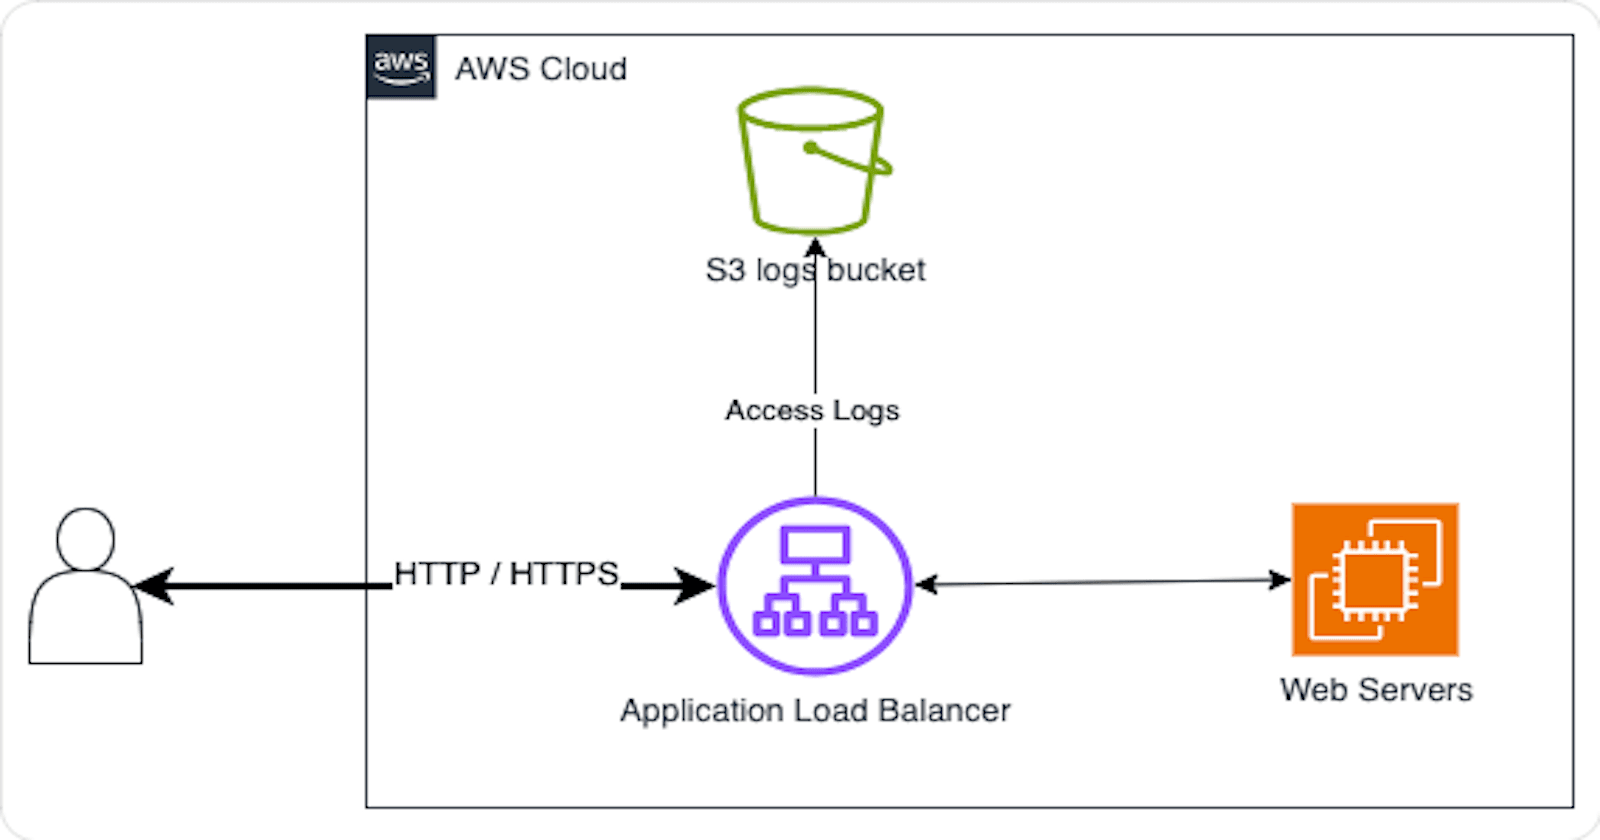
Access logs in Elastic Load Balancing is an optional feature, and it comes disabled by default. Once you activate/enable access logs for your load balancer, Elastic Load Balancing captures and stores the logs in the specified Amazon S3 bucket in compressed file format. Disabling access logs can be done at any point in time. For every load balancer node, Elastic Load Balancing generates a log file every 5 minutes. The delivery of logs follows an eventually consistent model. Each log file includes details such as the time of request receipt, client IP addresses, latencies, request paths, and server responses. You must create S3 bucket for access logs before you enable the access logs.
Setup S3 Bucket
The bucket must be located in the same Region as the load balancer.
The bucket and the load balancer can be in same or different account.
-> Connect the AWS Console and Open the Amazon S3 console
-> Select Create Bucket

-> Select the region of the bucket
-> Enter the name of the bucket
-> Scroll down
-> Select the default encryption, Amazon S3-managed keys (SSE-S3)
-> Select Create bucket


Attach bucket policy
S3 bucket must have a bucket policy that grants Elastic Load Balancing permission to write the access logs to the bucket.
-> Connect the AWS Console and Open the Amazon S3 console
-> Select your bucket

-> Select Permission tab
-> Select Edit under Bucket policy

-> Replace the account ID mentioned in the principal. This AWS account is managed by AWS and you have to select the one which assigned to each region.
-> Scroll Down and Select Save Changes

Enable and Configure the Access logs
-> Navigate to the Amazon EC2 Console
-> Select Load Balancers from the left navigation pane

-> Select the attribute tab
-> Select Edit under the attributes

-> Scroll down the edit page
-> Enable access logs under Monitoring section
-> Select Browse for selecting the bucket

-> Select the radio button of the bucket
-> Select Choose button on the popup window

-> Select Save Changes


Validation
-> Navigate to Amazon S3 Console
-> Select the Access logs repository bucket
-> Navigate to the test log file Eg: repo-bucket/AWSLogs/aws account ID/ELBAccessLogTestFile

Clean Up
As this is a testing environment, you may not need to retain the AWS resources used for creating this lab. Therefore, delete the AWS resources you allocated to avoid incurring further charges.